Faery Ink Ophelia Jack-o-Lantern Witch

Good Morning everyone and Happy Hallowe'en! I thought I would share with you a colouring I did recently of Ophelia Jack o' Lantern Witch from Faery Ink. I used the background class from Kit adn Clowder for this one and absolutely love it. I just need to buy a frame to put her in and hang her up on my wall now!

This project is also for

Recipe:

Stamps: Ophelia Jack o' Lantern Witch from Faery Ink

Papers: Super Smooth Card from That Craft Place

Copics Used:
Skin - E000, E00, E21, E11, E04, R20, R30
Hair - G14, G05, G17, G28
Eyes - BV23, BV25, BV29
Lips - V05, V06, V09
Skirt, Top & Hat Band - BV11, BV13, BV04, BV08
Corset, Collar & Cuffs - YR15, YR16, YR18
Hat & Top Layer of Skirt - C5, C7, C9
Pumpkins - YR04, YR68, YR07, YR09, E15, E18, YG01, YG05, YG09, Y32, Y35, Y38
Trees - E71, E74, E77, E79
Grass - YG13, G21, YG61, YG63, G46, G99
Sky - BV000, BV00, BV13, BV25, BV29,  B00, BG15,
Clouds - BV000, BV00, BV02, BV20

And that's all from me for this post folks! Thanks for stopping by and don't forget to pop on over to the Faery Ink blog and the Faery Ink Facebook group and check out all the other fabulous projects from Amanda and other Faery Ink fans too!


Penguins Sing We Wish You A Merry Christmas

Good afternoon and welcome to another post for fun from me today! Today is the last day of half term so it is back to work tomorrow and I have a pile of planning that needs doing this afternoon. Oh the joys of teaching! Actually I do really enjoy my job and look forward to going into school now I have changed schools!

Anyway I decided to make a cute Lawn Fawn card this morning using the Here We Go A-Waddling set and kept it fairly flat and simple so I have another one for posting. It gets quite expensive to post thick and heavily embellished cards over here in the UK, so I do like to make a few flatter ones to cut down on postage costs.


Recipe:

Stamps: Here We Go A-Waddling from Lawn Fawn

Papers: Soft Sky, Pear Pizzazz, Whisper White & All IS Calm DSP (Retired) all from Stampin' Up, Super Smooth Card from That Craft Place

Inks: Memento Tuxedo Black, Copic Markers

Accessories: Lost Lagoon Ribbon (Retired) from Stampin' UP, Snowflake Sequins from Bright Ideas, Icicle Stickles, Treescape Die from Sugar Pea Designs, Stitched Curved Border Dies from eBay

Copics Used:
Beaks & Feet - YR15, YR16, YR18
Green - YG61, YG63, YG67
Teal - BG72, BG75, BG78
Aqua - Bg11, Bg13, BG15
Black - C5, C7, C9

And that's all from me for this post folks! Thanks for stopping by!

Unicorns Make A Wish

Good evening! I have developed a slight addiction to all these cutesy stamp sets that have been released recently that are a smaller sized image than I usually colour. They are just adorable and I had to get some of the Lawn Fawn ones and have a handful of these sets now. I decided to use my Critters Ever After set today and make a cute unicorn card. I do love my unicorns and went all girly on this one!

I also used my Nuvo Embellishment Mousse on the cloud die cuts and just love that extra shimmer it gives to the card. Not sure if you can see but the middle cloud is a mixture of a lilac and a pale blue and I love it! Will definitely be buying more of these mousses and trying out different techniques with them!

This card is also for

Recipe:

Stamps: Critters Ever After from Lawn Fawn

Papers: Blushing Bride, Sahara Sand, Whisper White & Falling In Love DSP all from Stampin' Up, Super Smooth Card from That Craft Place

Inks: Blushing Bride & Soft Sky both from Stampin' Up, Memento Tuxedo Black, Copic Markers

Accessories: Die-Namics Stitched Cloud Border Dies from MFT Lilac Lavender & Powder Blue Embellishment Mousses from Nuvo, Sequins from stash

Copics Used:
Hooves - W1, W3
Shading on Unicorns - C1
Pink Unicorn - R81, R83, R85
Lilac Unicorn - BV000, BV00, BV02
Blue Unicorn - B00, B01, B02
Horns - B00, B01, BV00, BV02, Y11, Y13, R81, R83
Inner Ears - R11
Castle - W00, W1, W3, W5, Y11, Y13, R81, R83, BV00, BV02, Yr21, YR23, E31, E33, E35

And that's all from me for this post folks! Thanks for stopping by!

Polkadoodles Winnie Wednesday Hallowe'en Week Planner Pages

Good evening! That sure is a long title for a blogpost! I have actually made a weekly page layout for my planner this week. I bought this planner during the summer holidays from Hobbycraft as it was pink and shiny and just oh so pretty. I managed to decorate one set of pages which I never blogged and haven't touched it since, not even to add anything in to! I generally add appointments to my planner on my phone and set reminders for them and write any DT assignments in a different diary.

But as it is Hallowe'en week next week and I bought the fantastic Winnie Wednesday collection from Polkadoodles I thought I would attempt to do something. Now it looks nothing like what I started out making! I don't have many stickers for my planner and none that would work on this week's layout, so instead I used the pages as a canvas and just created 2 scenes with inked backgrounds and lots of die cuts as well as the Winnie Wednesday images and sentiments.

The background didn't come out as I planned either as the colours I used were too dark. I got some new distress ink mini cubes and thought I would try them out. The Seedless Preserves is a gorgeous colour, but the Fired Brick didn't go so well with it, so I ended up going over the Fired Brick with more Seedless Preserves making it really dark, but I guess it looks kind of ok, but not as purple in the photo as in real life. Shame the writing can hardly be seen though!

This project is also for

Recipe:

Stamps: Winnie Wednesday Collection from Polkadoodles

Papers: Basic Black from Stampin' Up, Super Smooth Card from That Craft Place

Inks: Seedless Preserves, Fired Brick & Mowed Lawn Distress Inks from Tim Holtz, Copic Markers

Accessories: Skinny Mini Halloween Borders Dies from Taylored Expressions, Mini Bats Dies from Impression Obsession, House, Tree & Ghosts Dies all from eBay

Copics Used:
Winnie Wednesday (Left)
Skin - E000, E00, E21, E11, E04, R20, R30
Hair - C5, C7, C8, C9
Dress - C3, C5, C7, C8, C9
Tights & Shoes - C5, C7
Leaf - YG93, YG97
Grass - YG93, YG97, YG99
Pumpkins - E15, E18, YR04, YR68, YR07, YR09, Y15, Y18

Winnie Wednesday Witch (Right)
Skin - E000, E00, E21, E11, E04, R20, R30
Hair - V12, V15, V17
Dress - BV23, BV25, BV29
Hat Band & Ribbon - BV02, BV04, BV08
Hat & Cloak - C5, C7, C9
Buckle - C1, C2
Cat, BV20, BV23, BV25, BV29
Leaves - E08, E09
Broom - E33, E35, E37, E39
Grass - G14, G17
Pumpkins - E15, E18, YR04, YR68, YR07, YR09

And that's all from me for this post folks! Thanks for stopping by!

Whimsy Stamps Inspiration Post - Positivity Sentiments 2 & Summer Rose Papers

Good Morning and welcome to my DT Inspiration post for Whimsy Stamps. This week I am sharing with you a non Christmas card for a change! I love this sentiment that Tracy has included in her Positivity Sentiments 2 set and made a frame rather than a card this time. I used the Summer Rose Papers as well and attempted a vintage sort of look with lots of frantage in the corners too.


Papers:

Stamps: Positivity Sentiments 2 from Whimsy Stamps

Papers: Berry Burst & Sahara Sand both from Stampin' Up, Summer Rose Papers from Whimsy Stamps

Inks: None!

Accessories: Berry Burst Ribbon from Stampin' Up, Lace from Brenda's Lace & Ribbons, Shabby Pink Frantage Embossing Powder from Stampendous, Flowers from my lovely friend Sue, Beaded Flower Centres from Cuddly Buddly, Vintage Floral Punch Around The Page from Martha Stewart

And that's all from me for this post folks! Thanks for stopping by and don't forget to pop on over to the Whimsy Stamps and Inspiration Group on Facebook and check out all the other fabulous creations from the rest of the DT this month.

Faery Ink Inspiration Post - Fable Reindeer Fae

Good Morning and welcome to a new DT post from me for Faery Ink. The DT have been on a bit of a break for a little while now, but following Amanda's newsletter last week, I offered to colour some images up for her and she said she would love me to! I do love these images and the wide range of themes and styles that Amanda draws.

This gorgeous gal is Fable Reindeer Fae and I went with traditional brown, red and white for her and made a bit of a woodland scene using my dies. I added some white ink to the trees for the snow and used some of my new Embellishment Mousse on the snow to add a bit of pearlescent shimmer, although the camera didn't pick that up very well.

This card is also for

Recipe:

Stamps: Fable Reindeer Fae from Faery Ink, Reindeer Games from Kraftin' Kimmie Stamps

Papers: Real Red, Early Espresso, Garden Green, Whisper White & Candy Cane Lane DSP (Retired) all from Stampin' Up, Super Smooth Card from That Craft Place

Inks: Real Red & Whisper White both from Stampin' Up, Copic Markers

Accessories: Christmas Trees Dies 6002/2056 & Santa With Sleigh Die 6002/2026 both from Joy Crafts, Die-Namics Hit The Slopes Dies from MFT, Powder Blue Embellishment Mousse from Nuvo

Copics Used:
Skin - E000, E00, E21, E11, E04, R20, R30
Hair - E71, E74, E77, E79
Eyes - E53, E55, E57
Lips - R20, R22
Ears - E70, E71, E74
Antlers - E51, E53, E55
Nose & Dress - R24, R27, R29

And that's all from me for this post folks! Thanks for stopping by and don't forget to pop on over to the Faery Ink Blog and check out all the news from Amanda over there.

Ching-Chou Kuik Inspiration Post - Wishing Stars

Good morning and welcome to my last inspiration post for this month for Ching-Chou Kuik. This week I am sharing an older image, Wishing Stars, that I found the other day, completely coloured, but never used, so I thought I would add her to a card for today's post. Isn't she just gorgeous?!

This card is also for
As you Like It Challenge: People or Animals (I prefer to colour people as I just cannot make animals fur look right. It just either ends up all blended smoothly or a mess!) 

Recipe:

Stamps: Wishing Stars from Ching-Chou Kuik, Star Prints from Papertrey Ink

Papers: Basic Grey & Smoky Slate both from Stampin' Up, Copic X-Press It Blending Card, Gorgeous Soft Pastels Patterned Papers from The Works

Inks: Basic Grey & Smoky Slate both from Stampin' Up, Copic Markers, Silver Wink of Stella

Accessories: Silver Ribbon from Stampin' Up, Back Pocket Basics Dies from Papertrey Ink, Starburst Die from Joanna Sheen, Star Trail Die from Tonic Studios, Cutting Hearts Patterns Die from Fantasy Dies

Copics Used:
Skin - E000, E00, E21, E11, E04, R20, R30
Hair - W3, W5, W7, W9, B24
Eyes & Ribbon - BG10, BG11, BG13
Dress - C00, C1, C2, C3, C5
Sky - BV20, BV23, BV25, BV29
Moon - C00, C1, C2, C3, C5
Grass - YG61, YG93, YG95, YG97

And that's all from me for this post folks! Thanks for stopping by and don't forget to pop on over to the Ching-Chou Kuik Inspiration and Challenge blog and check out all the other fabulous inspiration projects from the rest of the DT for this month and why not join in the monthly challenge, Hallowe'en/Fright Night whilst you are there too?!

The Paper Shelter Challenge #314 - Make It Square

Good Morning and welcome to my DT post for this week's challenge from The Paper Shelter. This week the challenge is called Make It Square - a fairly easy one, simply make a square shaped card or project!

I used the adorable So Comfy and So Fluffy! stamp for a cute Christmas card. I just love the look on Santa's face as he's playing on Rudolph's back! I was hunting in a drawer of odds and ends and found some more fluffy stuff in a proper white colour this time and some glittered texture paste which was perfect as my snow!

I used some old Stampin' Up patterned papers, which are not technically Christmas or winter papers but the colours in them match the colours I used on the image perfectly (I tend to colour first and then find colours to match when making up my card)!


Recipe:

Stamps: So Comfy and So Fluffy! from The Paper Shelter

Papers: Coastal Cabana, Real Red, Whisper White & Fresh Prints DSP (Retired) all from Stampin' Up, Super Smooth Card from That Craft Place

Inks: Copic Markers

Accessories: Real Red Ribbon, Real Red Baker's Twine, Red Bell & Pine Cone Charms all retired & from Stampin' Up, Gems from Poundland, Precious Snowflakes Dies from Memory Box, Fluffy Stuff from Woodware, Sparkle Texture Paste from Cosmic Shimmer, Peeking Snowflake Dies from Creative Expressions

Copics Used:
Skin - E000, E00, E21, E11, E04, R20, R30
Hair & Beard -C1
Santa's Outfit - R35, R37, R39
Black - C5, C7, C9
Reindeer - E21, E23, E25, E27, E29
Reindeer's Nose - R22, R24, R27, R29
Inner Ears - R21, R20, R22
Snow - B0000, B000, C0
Sky - BG000, BG10, BG11, BG13

And that's all from me for this post folks! Thanks for stopping by and don't forget to pop on over to the Paper Shelter Challenge Blog and check out all the other fabulous projects from the DT and why not join in the fun whilst you are there too! As always there are some fabulous prizes to be won!

Challenge prize badge

Scrapper's Delight - Winnie Halloween Witch

I thought I would share with you today a colouring I did for my quotes journal, although this isn't really a quote as such, just a gorgeous image that I loved and made too big for a card, so I thought I would add it in this book instead.

My lovely friend Janice designed this amazing image for her store Scrapper's Delight and I had to have her immediately. If you haven't noticed I love all things Hallowe'en and this image was another to add to my ever increasing collection of Hallowe'en images.

I also added (after I had finished the colouring mind you!), the wall, lamp, raven and bats from my new Stampin' Up set, Graveyard Gate. Had I thought about it beforehand I would have added in a proper graveyard scene with some gravestones etc but it only occurred to me when I was looking for sentiments to use and remembered this stamp set!

This project is also for

Recipe:

Stamps: Winnie Halloween Witch 1 from Scrapper's Delight, Graveyard Gate from Stampin' Up, Happy 31st Sentiments from C.C.Designs

Papers: Basic Black & Halloween Night DSP (Retired) both from Stampin' Up, Super Smooth Card from That Craft Place

Inks: Basic Black from Stampin' Up, Copic Markers, Silver At You Spica Pen

Accessories: Spiderweb Corner Die from eBay

Copics Used:
Skin - E000, E00, E21, E11, E04, R20, R30
Hair - G24, G05, G28
Hat & Cloak - C5, C7, C8, C9
Buckle - YR21, YR23, YR24
Skirt, Shoes & Clock Hands - C7, C8, C9
Violet - V01, V04, V05, V06, V09
Lime Green - YG01, YG03, YG05, YG07
Tights - V93, V95, V99
Orange on bag - YR12, YR16, YR18
Broom - E08, E09, E18, E35, E15, E99, E57, E59
Clock - Y0000, Y00, Y11, YR31, Y02
Pumpkins - YR04, YR68, YR07, YR09, E15, E18, Y13, Y15, Y19
Ground - W1, W3, W5, W7
Sky - C00, C0, C1, C2, C3, C5

And that's all from me for this post folks! Thanks for stopping by!

Whimsy Stamps Challenge - Anything Goes

Good Morning and welcome to my post for this month's challenge from Whimsy Stamps. As always the challenge is an Anything Goes challenge and I sued the adorable Penguin Skier 2 digital stamp for my card. I went for an all blue colour combo and love how this one turned out. I also used an old, but favourite sentiment set from Whimsy Stamps called Holiday Mini Tickets, which was one of my first sentiment sets from Whimsy years ago.

This card is also for

Recipe:

Stamps: Penguin Skier 2 & Holiday Mini Tickets both from Whimsy Stamps

Papers: Marina Mist & Whisper White both from Stampin' Up, Frosty Christmas Patterned Papers from Lili of the Valley

Inks: Marina Mist from Stampin' Up, Copic Markers, Clear & Silver Wink of Stella

Accessories: Marina Mist Ribbon (Retired) from Stampin' Up, Snowflake Punch Die from Marianne Design, Ice Crystals Dies 6002/2054 from Joy Crafts

Copics Used:
Feathers - C5, C7, C9
Beak & Feet - YR15, YR16, YR18
Hat, Scarf & Gloves - B91, B93, B95, B97
Skis - B45, B37, B39
Goggles - B21, B45, B37, T1, T2, T6
Ski Handles & Foot Straps on Skis - W1, W3, W5
Snow - C00, B000, B01, T1

And that's all from me for this post folks! Thanks for stopping by and don't forget to pop on over to the Whimsy Stamps Challenge blog and check out all the other gorgeous projects from the DT and why not join in the fun whilst you are there too?!

Ching Chou Kuik Inspiration Post - The Perfect Pumpkin

Good Morning and welcome to my inspiration post this week for Ching-Chou Kuik. This week I am sharing another Hallowe'en card with you, using the gorgeous The Perfect Pumpkin. This image could easily be used for an Autumn/Fall project too.

I am trying to use up lots of my old patterned papers and am slowly making my way through this pack from Doodlebug that I bought for Hallowe'en projects last year, but to be honest it is not very Hallowe'en-y in my opinion, just the colours are. Still makes a nice bright card though.

This card is also for

Recipe:

Stamps: The Perfect Pumpkin from Ching-Chou Kuik, Friendship Jar: Fall Fillers from Papertrey Ink

Papers: Perfect Plum, Basic Black and Pumpkin Pie all from Stampin' Up, Halloween Assortment from Doodlebug, Super Smooth Card from That Craft Place

Inks: Copic Markers

Accessories: Pumpkin Pie Ribbon (Retired) and Basic Black Vintage Crochet Trim both from Stampin' Up, Flowers from Cuddly Buddly, Die-Namics Spooky Scene Dies from MFT, Strolling Kitties Dies from Poppy Stamps, Happy Halloween Border Die from Memory Box

Copics Used:
Skin - E000, E00, E21, E11, E04, R20, R30
Hair - YG01, YG05, YG09, G05
Eyes - E25, E27, E29
Dress & Hat - BV13, BV04, BV17, BV08
Hatband & Choker - C5, C7, C9
Flowers - YR04, YR68, YR09
Cat - C3, C5, C7, C9
Cat's Inner Ears - R30, R20
Pumpkins - YR04, YR07, YR09, E08, E09
Toadstools - E74, E77, R24, R27, R29

And that's all from me for this post folks! Thanks for stopping by and don't forget to pop on over to the Ching-Chou Kuik Inspiration and Challenge blog and check out all the other fabulous inspiration from the rest of the DT for this week and why not join in our challenge, Hallowe'en/Fright Night, whilst you are there too?!

Whimsy Stamps Inspiration Post - Snowman 2 Sentiments

Good Morning and welcome to my weekly inspiration post for Whimsy Stamps. This week I am sharing with you the adorable Snowman 2 Sentiments set designed by Tracy Wray. I thought these cute snowmen would make great gift tags so created 2 identical tags, just swapped out the image. I also used the Icicle Digital Papers.

These gift tags are also for


Recipe:

Stamps: Snowman 2 Sentiments from Whimsy Stamps

Papers: Marina Mist & Whisper White both from Stampin' Up, Icicle Papers from Whimsy Stamps, Super Smooth Card from That Craft Place

Inks: Copic Markers

Accessories: Marina Mist Ribbon (Retired) & Whisper White Ribbon (Retired?) both from Stampin' Up,  Oval Nestabilities Dies & Elegant Oval Dies both from Spellbinders, Shimmering Snowflakes Dies from Memory Box, Snowflake Punch Die form Marianne Designs

Copics Used:
Grey - W1, W3, W5, W7
Blue - B02, B04, B06
Nose - YR04, YR09, YR18
Shading on Snowmen - C00, C1
Snow - BG0000, B000

And that's all from me for this post folks! Thanks for stopping by and don't forget to pop on over to the Whimsy Stamps and Inspiration Group on Facebook and check out all the other fabulous creations from the rest of the DT this month.

The Outlawz Twisted Thursday Guest Designer Post

Good Morning and welcome to my GDT post for The Outlawz Twisted Thursday Challenge. I do love The Outlawz for all their challenges and I used to be part of the Friday Colouring Challenge a couple of years ago, but had to leave because of work commitments and lack of time. I do try to join in to their challenges when I can and was pleasantly surprised to be invited by Angela to join them all for a GDT post this month.

I chose to use bunting and banners for my twist this week and the sponsor is The Greeting Farm.  I was hoping to use the new Hallowe'en set from them for this challenge, but sadly it wasn't released in the UK in time for me to make this card, so I opted for the adorable Little Mermaids set instead and made a shaker card for a change. What do you think? I love it!

This card is also for
As You Like It Challenge Ribbons or Flowers (I love ribbons especially when they match my cardstock or patterned papers! Just add that little extra something special to a project!)

Recipe:

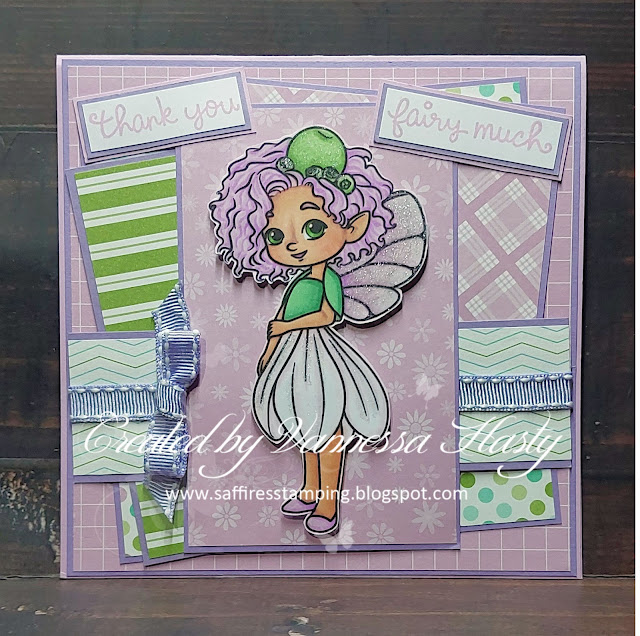
Stamps: Little Mermaids from The Greeting Farm

Papers: Island Indigo, Night of Navy, Hello Honey (Retired) & By The Shore DSP (Retired) all from Stampin' Up, Super Smooth Card from That Craft Place, Acetate sheet

Inks: Night of Navy & Hello Honey (Retired) both from Stampin' Up, Memento Tuxedo Black, Copic Markers

Accessories: Night of Navy Ribbon (Retired) from Stampin' Up, Banner Die from NCraft Design (off eBay), Sequins from The Range

Copics Used:
Skin - E000, E00, E21, E11, E04, R20, R30
Purple Hair - V12, V15, V17, V09
Green Tail - YG01, YG05, YG07, YG09
Yellow Top - Y13, Y15
Turquoise Hair - BG01, BG05, BG07, BG17
Orange Tail - Y08, Y35, Y38, YR14, YR15
Purple Top - V04, V06
Pink Hair - RV21, RV23, RV25, RV29
Yellow Tail - Y13, Y15, Y18, Y19
Green Top - YG21, YG23
Orange Fish - YR02, YR04, YR07, YR09
Blue Fish - B04, B06, Y13, Y18
Purple Fish - V20, V22, V25
Seaweed - YG03, YG07, YG09
Castle - Y21, Y23, Y26, Y28
Starfish - YR12, YR15, YR16

And that's all from me for this post folks! Thanks for stopping by and don't forget to pop on over to the Twisted Thursday Challenge at The Outlawz and check out all the other fabulous projects from the DT for the this challenge too.

Sherri Baldy My Besties Lil Rascal Lil Rosie Candy Cane

Good Morning and welcome to another new release from Sherri Baldy's Lil Rascal collection. Today I have used the adorable Lil Rosie Candy Cane and dug out my Christmas Tree Card Shape Template to create a slightly different card this time.

This is the card closed - just some gold threaded Baker's Twine and some gems added to it to make it sparkle.


And the inside with the cute Lil Rosie in the middle. I could decide if I should add patterned papers to the inside of the gate fold "doors", so left them blank in the end to leave space for the message.


Recipe:

Stamps: My Besties Lil Rascal Lil Rosie Candy Cane from Sherri Baldy

Papers: Garden Green, Chocolate Chip & Champagne Glimmer Paper all from Stampin' Up, Sunny Side Up Patterned Papers (Retired) from Lili of the Valley, Super Smooth Card from That Craft Place

Inks: Copic Markers

Accessories: Gold Baker's Twine from Stampin' Up, Frozen Forest Tree Card Shape Template from Studio Light, Gems from Poundland, Merry Christmas Dies from Creative Dies, Seeing Stars Dies from Papertrey Ink

Copics Used:
Skin - E000, E00, E21, E11, E04, R20, R30
Hair - E74, E77, E79
Eyes - E71, E74, E77
Dress - YG61, YG63, YG67, G28
Hair Bow - R22, R24, R27, R29
Flowers, Candy Cane & Dress Bow - R24, R27, R29
Shoes & Candy Cane Bow - YG61, YG63, YG67
Ear Muffs - YG11, G000, G40
Leaves - YG05, YG09

And that's all from me for this post folks! Thanks for stopping by and don't forget to pop on over to the My Besties Facebook group and check out all the other fabulous inspiration there too.

Sherri Baldy My Besties Lil Rascal Rosie Beautiful Winter Day

Good Morning and welcome to a new release post from me for Sherri Baldy's My Besties Digital Stamps. Today I am sharing with you this adorable Lil Rascal sitting on the fence in the snow on a beautiful Winter's day.

I decided on a blue and red colour combo and love how the bright red pops out against the pale blue. I am trying to make a few flat Christmas cards for posting so kept the embellishments to a minimum this time - just a few poinsettia die cuts and some ribbon.

This card is also for


Recipe:

Stamps: My Besties Lil Rascal Rosie Beautiful Winter Day from Sherri Baldy

Papers: Marina Mist, Whisper White, Garden Green & Cherry Cobbler all from Stampin' Up, Frosty Christmas Patterned Paper from Lili of the Valley, Super Smooth Card form That Craft Place

Inks: Copic Markers

Accessories: Marina Mist Ribbon (Retired) from Stampin' Up, Poinsettia Dies from Britannia Dies, Ice Crystal Border Die 6002/2021 from Joy Crafts, Star Dust Stickles, Yellow 3D Pearl Effects from Dovecraft

Copics Used:
Skin - E000, E00, E21, E11, E04, R20, R30
Hair - E23, E25, E27
Eyes - E15, E18
Jeans - B12, B14, B16, B18
Scarf, Gloves & Heart - R22, R24, R27, R29
Jumper - B00, B01, B02, B04
Ear Muffs - B0000, B000, B00, B01
Shoes - E84, E87, E89
Socks - R46
Fence - E33, E35, E37
Poinsettias - R46, R56, R59, Y19
Leaves - G05, G28
Pear - YG01, YG03, YG05
Robin - E23, E25, R46
Bows & Stocking - B14, B16, B18
Snow - B0000, B000

And that's all from me for this post folks! Thanks for stopping by and don't forget to pop on over to the My Besties Facebook group and check out all the other fabulous inspiration from the rest of the DTs  and our fans too.

Simply B Stamps - Cast A Spell Betty

Good evening! I have finally gotten round to blogging my September Progressive Challenge Card for Simply B Stamps. I am obviously far too late to enter it in the Challenge but at least I got her coloured up within the month it was due in. I keep forgetting to do these images and am constantly on a time out and have to buy myself back in as per the rules of the challenge, so I do apologise to Betty and Rio for being so disorganised! I really should add it to my planner next time! (Not that I actually write anything in my planner that I just had to have!)

The challenge was to include some dotty paper and 2 ribbons, which  I have done. I also made her dress spotty to match the purple paper and I love how it looks!

This card is also for

Recipe:

Stamps: Cast A Spell Betty from Simply B Stamps

Papers: Pumpkin Pie & Basic Black both from Stampin' Up, Winnie Wednesday Papers from Polkadoodles, Super Smooth Card from That Craft Place

Inks: Copic Markers, Molotow White Paint Pen

Accessories: Pumpkin Pie Ribbon (Retired) from Stampin' Up, Spiderweb Punch Around The Page from Martha Stewart, Black Ribbon from stash

Copics Used:
Skin - E000, E00, E21, E11, E04, R20, R30
Hair - YG03, YG05, YG07, YG09
Eyebrows - C7, C9
Eyeshadow - BV20, BV23, BV25, BV29
Lips - V04, V06, V09
Dress & Purple Stripes on Leggings - V12, V15, V17
Hat, Shoes & Dress Trims - C5, C7, C9
Cauldron - W5, W6, W8
Orange - YR04, YR07, YR09, YR18
Sparkles - V93, V09, YG0000, YG00, YG01, YG05
Cat - W00, W1, W3, W5, W6, RV00, YR15, YR18
Ground - W1, W3, W5, W6, W8

And that's all from me for this post folks! Thanks for stopping by! 

Ching-Chou Kuik October Challenge - Hallowe'en/Fright Night

Good morning and welcome to my post for the new challenge from Ching-Chou Kuik Inspiration and Challenge blog. This month's challenge is a VERY special challenge.


Yes it is amazing to think that we are celebrating our 3rd anniversary of the Monthly Blog Challenge on the Ching-Chou Kuik Digital Stamps Inspiration and Challenge Blog. As it is our third birthday there will not be just one Monthly Challenge Winner but THREE monthly challenge winners as well as the Artist Choice Award Winner picked by Ching-Chou Kuik herself.

The challenge this month is Hallowe'en or Fright Night and I used the gorgeous Let's Go Party and lots of Hallowe'en themed die cuts using my new dies from eBay. 


This card is also for 

Recipe:

Stamps: Let's Go Party from Ching-Chou Kuik, Halloween Treats & Sweets from Papertrey Ink

Papers: Pumpkin Pie & Basic Black both from Stampin' Up, Super Smooth Card from That Craft Place, Halloween Assortment Patterned Papers all from Doodlebug

Inks: Pumpkin Pie from Stampin' Up, Copic Markers, Clear Star Gelly Roll Pen

Accessories: Basic Black Vintage Crochet Trim from Stampin' Up, Oval Nestabilities from Spellbinders, Skinny Mini Halloween Borders from Taylored Expressions, Bats, Spiderweb Corner & Hat Dies all from eBay

Copics Used:
Skin - E000, E00, E21, E11, E04, R20, R30
Hair - YG01, YG05, YG07, YG09
Eyes - YG23, YG25
Lips - V01, V05
Hat - C5, C7, C9, V06
Top & Hat Band - V01, V04, V06, V09
Wings - T2, BV20, BV31, BV000
Skirt - YR16, YR07, YR09, YR18
Ribbon & Jewellery - V04, V05
Moon - T1, T2
Bunny Bats - C3, C5, C7
Background - C00, C1, C2

And that's all from me for this post folks! Thanks for stopping by and don't forget to pop on over to the Ching-Chou Kuik Inspiration and Challenge blog and check out all the other fabulous inspiration from the DT for this month's challenge and why not join in the fun whilst you are there too?!

Whimsy Stamps Inspiration Post - Gingerbread Man & Christmas Mix 2 Sentiments

Good Morning and welcome to my first inspiration post of the month for Whimsy Stamps. Today I am using the gorgeous Gingerbread Man and Christmas Mix 2 Sentiments. I am not a fan of eating gingerbread people to be honest as I don't really like ginger very much, but I do love gingerbread people characters and this one is just adorable, don't you think?!

This card is also for

Recipe:

Stamps: Gingerbread Man & Christmas Mix 2 Sentiments both from Whimsy Stamps

Papers: Real Red, Crumb Cake & Candy Cane Lane DSP (Retired) all from Stampin' Up, Super Smooth Card from That Craft Place

Inks: Chocolate Chip from Stampin' Up, Copic Markers

Accessories: Whisper White Ribbon (Retired) from Stampin' Up, Oval & Scalloped Oval Nestabilities all from Spellbinders

Copics Used:
Body - E31, E33, E34, E35
Nose - C7, C9
Red - R24, R27, R29
Shading on White - C00
Ground - W1, W3, W5

And that's all from me for this post folks! Thanks for stopping by and don't forget to pop on over to the Whimsy Stamps and Inspiration group on Facebook and check out all the other fabulous creations from the DT this month!

The Paper Shelter Challenge #312 - Border Dies or Punches

Good Morning and welcome to my DT post for the latest challenge from The Paper Shelter. This week our challenge is to use border dies or punches - a great way to add some texture and a different style to your card or project.

I used the gorgeous Halloween Spell for my card and my oh so faithful Spiderweb Punch Around The Page set from Martha Stewart. This set sure does get used a lot on my Hallowe'en cards and projects! I just love it!


This card is also for

Recipe:

Stamps: Halloween Spell from The Paper Shelter

Papers: Basic Black, Pumpkin Pie & Halloween Night DSP (Retired) all from Stampin' Up, Super Smooth Card from That Craft Place

Inks: Copic Markers

Accessories: Orange Lace from Trimits, Spiderweb Punch Around The Page Set from Martha Stewart, Make A Card #8 Dies from C.C.Designs

Copics Used:
Skin - E000, E00, E21, E11, E04, R20, R30
Hair - YG03, YG07, YG09, G05
Eye - E15, E18
Lips - Bv11, BV13
Dress - V01, V04, V05, V06, V09
Cauldron & Hat - C5, C7, C9
Hat Band - V04, V06, V09
Buckle & Frame - Y23, Y26, Y28
Flower - YR23, YR24, YR27
Bubbles - YG00, YG01, YG03
Pumpkins - YR04, YR07, YR09, E09, Y32, Y35, Y38
Outer Ring - BV0000, BV000, BV00
Inner Ring - C00, C1, C2
Halloween Word - YG01, YG03, YG05
Spell Word - YR04, YR07, YR09

And that's all from me for this post folks! Thanks for stopping by and don't forget to pop on over to the Paper Shelter Challenge Blog and check out all the other fabulous projects from the DT and why not join in the fun whilst you are there too! As always there are some fabulous prizes to be won!

Challenge prize badge

Scene It Sunday #180 Featuring Fore You from Di's Digi Stamps

Good morning and welcome to this week's Scene It Sunday. This week I have used this cute golfing mice image from Di's Digi Stamps, ...