Showing posts with label Movie Stars. Show all posts

Scene It Sunday #147 featuring Mando-Grogu from Beat Paper Designs

Good morning and welcome to this week's Scene It Sunday post, although I have cheated with the scene a bit, I think as there's not a great deal in the background! I bought these digi stamps from Beat Paper Designs with every intention to make a card for Star Wars Day on May 4th, but it never happened in time! It is here now though, so a great card for any Star Wars fan! 


Recipe:

Stamps: Mando-Grogu from Beat Paper Designs, Out of This World & An Open Book both from Clearly Besotted

Papers: Pumpkin Pie Basic Black & Pumpkin Pie Prints DSP (Retired) all from Stampin' Up, Ultimate White Graphic Paper, Make It Colour Blending Card from Make It Crafty

Inks: Versamark, Copic Markers, Carved Pumpkin, Spiced Marmalade, Squeezed Lemonade & Mustard Seed Distress Oxide Inks all from Tim Holtz

Accessories: White Embossing Powder from Stampin' Up, Gems from Poundland

Copics Used:
Mandalorian - T1, T3, T5, T7, T9
Grogu's Skin - YG11, YG13, YG17, R11, R12, R14, 
Grogu's Coat - E42, E43, E44, 
Grogu' Eyes - C5, C7, C9
Pod - N2, N3, N4, N5, R17, B000, B00

And that's all from me for this post folks! Thanks for stopping by and I hope to see you all again soon! 

Something Else on Saturday #204 Featuring The BFF from C.C. Designs

Good morning and welcome to this week's Something Else on Saturday post. I am sharing another Wednesday Addams car today, but this time using one of the new stamp sets from C.C. Designs, The BFF. I had seen a few cards with the window from Wednesday and Enid's bedroom at Nevermore Academy, so went hunting for one and found tons on Etsy! I did print it out a bit too large, but I like it! 

I stencilled the wall background before adding my stained glass window and then popped up the characters and sentiment. I bought this set specifically for this sentiment as I just love it! 


Stamps: The BFF from C.C. Designs, Ophelia Hall Window from The Cut Workshop

Papers: Basic Gray, Basic Black & Gray Granite all from Stampin' Up, Make It Colour Blending Card from Make It Crafty

Inks: Basic Black from Stampin' Up, Memento Tuxedo Black, Copic Markers, Hickory Smoke & Black soot Distress Oxide Inks both from Tim Holtz, White Gel Pen

Accessories: Bricks Stencil from Dutch Doobadoo

Copics Used:
Wednesday - E000, E00, E21, E11, E04, R30, R46, R89, N5, N7, N9, T1, T3, T5, T7, T9, E47, E49, C7, C9
Thing - E50, E51, E53
Enid -  E000, E00, E21, E11, E04, R30, R20, E51, E53, E55, RV02, RV04, RV06, RV09, V22, V25, V28, V91, V93, V95 ,V99, RV55, RV66, RV69, BG13, BG15,  BG18
Window - BG02, BG05, BG07, Y15, Y17, Y19, RV14, RV17, RV19, V15, V17, V09, V01, V04, V05, RV52, RV63, RV55, Y0000, Y000, Y00

And that's all from me for this post folks! Thanks for stopping by and have a great weekend! 

Something Else on Saturday #203 Featuring Miracle Family from Beat Paper Designs

Good morning and Happy Saturday! For today's Something Else on Saturday post, I pulled out my Miracle Family digi stamps from Beat Paper Designs, which I found on Etsy. I love Encanto and as soon as I saw this set, I just had to have them! It's such a fun movie and I love the fact the Mirabel can be a heroine without needing any special powers or gifts! 

Anyway....I used my Staggered Stage dies from Tonic Studios to make a big enough card for 5 of the characters and added lots of flowers and leaves to give a more tropical feel to the card as there are always lots of flowers in the film courtesy of Isabela!

This card is for

Recipe:

Stamps: Miracle Family from Beat Paper Designs

Papers: Pear Pizzazz, Pretty Peacock (Retired), Always Artichoke (Retired), Wild Wasabi (Retired) & Regal Rose (Retired) all from Stampin' Up, Make It Colour Blending Card from Make It Crafty

Inks: Copic Markers

Accessories: Staggered Stage Summer Picnic Dies from Tonic Studios, Woodland Folk Circular Additions Double Slider Set from Made To Surprise

Copics Used:
Skin - E000, E00, E21, E11, E04, R30, R20
Isabela - RV52, RV63, RV55, RV66, RV69, RV91, E71, E74, E77, E79, 100, 
Antonio - N5, N7, N9, 100, E44, E47, E49, YR02, YR04, YR07, R24, R27, R29, E83, E87, E89, E31, E33, E13, E15, E79, BG53, BG45, YR15, YR16, YG01, YG03, YG05, RV17, RV19, BV08, T7, T9
Mirabel - BG01, BG02, BG05, BG07, BG09, V04, V06, YG05, RV17, Y19, T7, T9, E25, E27, E29, 100, C5, C7, C9, RV19
Luisa - V12, V15, V17, V09, R43, R46, V0000, V000, Blender, E43, E44, E47, E49, 100
Bruno - E25, E27, E29, 100, E35, E37, E39, BG93, BG96, BG99, E70, E71, E74, C6, C8

And that's all from me for this post folks! Thanks for stopping by and I hope to see you all again soon! Have fun and enjoy the weekend! 

Something Else on Saturday #199 Featuring Wednesday Adams from Stamp Anniething

Good morning and welcome to this week's Something Else on Saturday post. I bought this digi image from Stamp Anniething a while back when she was first released and as I love the Wednesday Netflix show and the Addams family in general I just had to have her. 

I went for a completely black and grey combo and being an former goth (in my youth), this one really called out to me! I just wish I could get away with black hair now, but I think it would make me look a lot older! I do still wear lots of black though LOL


Recipe:

Stamps: Wednesday Adams from Stamp Anniething, Frightful & Delightful Sentiment Set from Stamping Bella

Papers: Basic Grey, Basic Black, Mocha Morning DSP (Retired), Night & Day DSP (Retired) & Nouveau Chic DSP (Retired) all from Stampin' Up,  Make It Colour Blending Card from Make It Crafty

Inks: Basic Grey from Stampin' Up, Copic Markers

Accessories: Basic Grey & Basic Black Ribbon from Stampin' Up, Decorative Labels 8 Dies from Spellbinders, Spiderweb & Spider Dies from La-La Land Crafts, Spiderweb Corners Dies from eBay, Gems from Poundland, Vintage Border Die 6002/0366fom Joy Crafts

Copics Used:
Skin - E000, E00, E21, E11, E04, R30, R20
Hair - C5, C7, C9
Black Clothes - T5, T7, T9
Grey Clothes - T2, T3

And that's all from me for this post folks! Thanks for stopping by and I hope to see you all again soon! Have a frightfully delightful day! 

Scene It Sunday #116 featuring Detective Dolls from Paper Nest Dolls

Good morning and welcome to this week's Scene It Sunday. For today's card, I thought I would do a different type of Hallowe'en card and used the Detective Dolls from Paper Nest Dolls aka The Scooby Gang! I love Scooby Doo and will happily sit and watch the TV show, the cartoon movies and the real life movies over and over!

I went for another Scenescape card, but yet again I cannot judge the size when printing these dolls out and they ended up being a bit too big! I think I am going to have to measure the card first before printing next time as it looks like it will work on my laptop screen when adding them to Word to print out! But it still looks cute! I had to mount them all onto black card as my Copics bled too much to the back and I hate seeing that! 

I tried to go for a creepy vibe with the spooky trees and fence. The pumpkins were totally inspired by the Happy Halloween Scooby Doo movie that I was on Now TV a couple of weeks ago with "mutant" pumpkins chasing the gang around! I  loved it! 


And another view from the top so you can see the Mystery Machine a bit more! 


Recipe:

Stamps: Detective Dolls from Paper Nest Dolls, Happy Haunting from Mama Elephant

Papers: Basic Black, Always Artichoke (Retired), Pumpkin Pie * Cute Halloween DSP (Retired) all from Stampin' Up, Halloween Market Patterned Papers from Carta Bella, Make It Colour Blending Card from Make It Crafty, Ultimate Graphic White Paper

Inks: Copic Markers, Versamark

Accessories: White Embossing Powder from Stampin' Up, Slimline Scenescape Dies from Mama Elephant, Border With Pumpkins Die LR0562 from Marianne Design, Spooky Fence Die rom Taylored Expressions, Spooky Scene Dies from My Favorite Things, Spooky Trees Dies from Lil'Inker Designs

Copics Used:
Skin - E000, E00, E21, E11, E04, R30, R20
Mystery Machine - YG21, YG23, YG25, FYG2, BG02, BG02, BG05, BG53, YR15, YR16, YR18< C4, C6, C7, C9, C1, C3, BG70
Shaggy - E31, E33, e37, G14, G16, G19, E21, E23, E25, E27, C5, C7, C9, E55, E57, E07, E08, R14, R17, G02, G05, Y15, Y18
Scooby - E31, E33, E35, E37, R00, R21, R22, T5, T7, T9, BG02, BG05, BG07, Y35, Y38
Velma - E13, E15, E18, B0000, B01, YR14, YR16, YR18, R35, R37, R39, BG70, FBG2, C2, C4
Daphne - R08, E08, E19, E09, YG13, YG07, YG09, V0000, V000, V01, V12, V15, V17, V04, V09
Fred - E31, Y21, Y23, Y26, B12, B14, B16, B18, C0, C1, Blender, R24, R27, R29, YR23, YR24, YR27 

And that's all from me for this post folks! Thanks for stopping by and I hope to see you all again soon! Have fun! 

All Things Magical and Mythical #51 Featuring Picture It Oz from Clearly Besotted

Good morning and welcome to this week's All Things Magical and Mystical post. I thought I would go for something a little different this week and inked up my Picture It Oz stamp set from Clearly Besotted. The Wizard of Oz is one of my favourite films, so I just had to get this set when it was released! I also got the Plushies in Oz set and while I did want to do a project with all the images on, there was just too much to put on one card!

So I have done an Emerald City card with the Wizard and a few of his munchkins and have plans to use the other set on another project in the future! I love this scene and love that Clearly Besotted backgrounds are starting to get a bit bigger as well as they fill the whole card really well! 

This card is for

Recipe:

Stamps: Picture It Oz from Clearly Besotted

Papers: Polished Pink & Garden Green both from Stampin' Up, Make It Colour Blending Card from Make It Crafty

Inks: Pixie Pink (Retired) from Stampin' Up, Memento Tuxedo Black, Copic Markers, Clear Star Gelly Roll Pen, White Gel Pen

Accessories: Crystal Effects from Stampin' Up

Copics Used:
Bears - E21, E23, E25
Green Hat & Bow Tie - G14, G16, G19
Red Bowtie - R35, R37, R89
Blue Bowtie - B02, B04, B06
Yellow Bowtie - Y13, Y15, Y17
Sky - B0000, B000, B00, B01, B02
Mountain - BV20, BV23, BV25
Rainbow - R24, R27, R29, YR15, YR16, YR18, Y13, Y15, Y19, YG05, YG07, YG09, B14, B16, B18, V05, V06, V09
Emerald City - G14, G16, G19
Grass - YG03, YG05, YG06, YG07, YG09
Pink Fields - R81, RV32, R85, RV34
Flowers - R43, R46
Yellow Brick Road - Y15, Y17, YR23, YR24

And that's all from me for this post folks! Thanks for stopping by and I hope to see you all again soon! Have fun and stay away from the poppy fields.

Something Else on Saturday #163 Featuring British Nanny from Scrappy Boy Stamps

Good morning and welcome to this week's Something Else on Saturday post. Today's card features this adorable take on Mary Poppins from Scrappy Boy Stamps, who gave this digi stamp away on Facebook a while ago. Their stamps are so cute, but as yet not available to buy or even to ship to the UK 😞 Hopefully they will be one day. They don't do digis either - this one was a one off! 

I inked up a cloudy sky and then added some building die cuts for hr to fly over. The sentiment was a perfect one as this card is going to one of my teaching assistants for the end of year. We only have 2 more weeks, well really 9 more working days left! 

This card is for
Passion for Markers Challenge Week 648 Bingo Board (Middle Column Die Cuts, Image Sentiment)

Recipe: 

Stamps: British Nanny from Scrappy Boy Stamps, Movers & Shakers Sentiments from Papertrey Ink

Papers: Marina Mist (Retired), Basic Black, Bumblebee (Retired) & Twitterpatted DSP (Retired) all from Stampin' Up, Make It Colour Blending Card from Make It Crafty, Ultimate Graphic White Paper

Inks: Cherry Cobbler from Stampin' Up, Copic Markers, Stormy Sky & Faded Jeans Distress Oxide Inks both from Tim Holtz

Accessories: Mini Cloud Edges Stencil from My Favorite Things, Buildings Dies from First Edition

Copics Used:
Skin - E000, E00, E21, E11, E04, R30, R20
Hair - E44, E47, E49
Dress - B91, B93, B95
Coat, Boots & Hat - B95, B97, B99
Flowers & Bag - R35, R37, R39
Umbrella - YG13, YG17, T5, T7, T9

And that's all from me for this post folks! Thanks for stopping by and I hope to see you all again soon! Have a supercalifragilisticexpialidocious day! 

Mirtillamente Challenge GDT Post

Good morning and welcome to my GDT post for the Mirtillamente Challenge this month. I was lucky enough to win on another challenge blog and the prize included being a guest designer for a future Mirtillamente challenge.

I have used the fabulous So'Getta Mavis, inspired by the character from Hotel Transylvania, which I absolutely love, although the newest one is my fave! To add to the Mavis theme, I added some bats around her, seeing as she is a vampire and added a sentiment using my dies with her "Zing!" phrase. 


Recipe:

Stamps: So'Getta Mavis from Mirtillamente

Papers: Real Red, Basic Black & Night & Day DSP (Retired) all from Stampin' Up, Sweet As Sugar Patterned Papers from Reverse Confetti, Make It Colour Blending Card from Make It Crafty

Inks: Copic Markers

Accessories: Mini Bats Dies from Impression Obsession, Alphabet Dies from Sizzix

Copics Used:
Skin - E000, E00, E21, E11, E04, R30, R20
Hair - C5, C7, C9
Eyes - BV23, BV25
Dress & Black Stripes on Tights - T6, T8, T10
Boots & Red Stripes on Tights - R24, R27
Goggles - R24, R27, R29, T6, T8

And that's all from me for this psot folks! Thanks for stopping by and I hope to see you all again soon! 

13 Days of Hallowe'en Day #8 Featuring Trick or Treat from The Greeting Farm

Good morning and welcome to today's 13 Days of Hallowe'en post. Today's post features an adorable digi stamp set from The Greeting Farm and instead of a card I made a picture/poster type thing to go with our Funko Pop figures that my boyfriend requested!


I showed him the Ghostbusters images from the set and he wanted me to make something to go on the wall and this is what I came up with! We're both big fans of Ghostbusters, me maybe more than him, so I just had to use Mr Stay Puft down on the streets of New York, walking through the skyscrapers, being hunted by the Ghostbusters! The skyscrapers were just rectangles that I added into the scene using Word and then I added the windows when I coloured them. 

This project is for

Recipe:

Stamps: Trick or Treat 4 from The Greeting Farm

Papers: lemon Lime Twist (Retired) & Basic Black both from Stampin' Up, Ultimate Graphic Paper, Make It Colour Blending Card from Make It Crafty

Inks: Copic Markers

Accessories: First Steps Dies & Delicate Letters #2 both from Sizzix, Spooky Scene Dies from MFT

Copics Used:
Left Boy's Skin - E21, E23, E25, R20, R22
Left Boy's Hair - T5, T7, T9
Middle Boy's Skin - E30, E31, E33, E35, R20, R22
Middle Boy's Hair - E25, E27, E29
Girl's Skin - E000, E00, E21, E11, E04, R30, R20
Girl's Hair - E50, E51, E53, E55
Jumpsuits - E42, E43, E44
Proton Packs - R14, R17, G14, G17, C6, C8
Goggles - C6, C8, C10
Green Ghosts - YG01, YG11, YG03, YG13
Yellow Ghosts - Y000, Y00, Y02, Y04
My Stay Puft - N0, N1, Blender, B14, B16, B18, R35, R37, R39
Lights - Y13, Y15, Y19, Y38
Buildings - W4, W6, W8, W5, W7, W9, T2, T4, T6, T1, T3, T5, C4, C6, C8, N3, N5, N7
Path - C3, C5, C7, C9
Sky - BV00, BV34, BV04, BV17, BV08

And that's all from me for this post folks! Thanks for stopping by and I hope to see you all again soon for another of my 13 Days of Hallowe'en! 

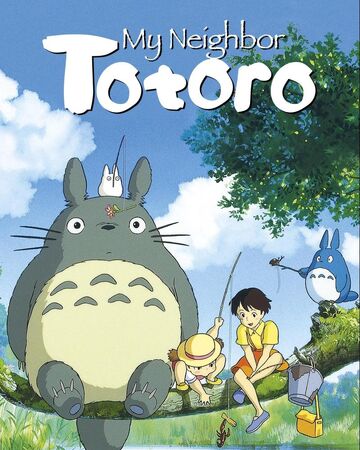
Something Else on Saturday #61 Featuring Totoros from MMedel Illustrations

Good Morning and welcome to this week's Something Else on Saturday post this week. I am sharing the card I made for my boyfriend's birthday back in May, using this cute set from MMedell Illustrations, featuring the characters from the film My Neighbour Totoro, which my boyfriend loves! 

My Neighbor Totoro | Dubbing Wikia | Fandom


This card is for

Recipe:

Stamps: Totoros from MMedell Illustrations, Little Darling Mermaid from Your Next Stamp

Papers: Marina Mist (Retired), Basic Gray, Wild Wasabi (Retired), Whisper White & Regals DSP (Retired) all from Stampin' Up, Make It Colour Blending Card from Make It Crafty

Inks: Marina Mist (Retired) from Stampin' Up, Tumbled Glass, Broken China, Faded Jeans Distress Ink Oxides all from Tim Holtz

Accessories: Mini Cloud Edges Stencil from My Favorite Things, Grassy Hillside Borders Dies from Lawn Fawn

Copics Used:
Tummies - E50, E51, E53
Big Totoro - W4, W6, W8
Middle Totoro - B93, B95, B97, N7
Little Totoro - C00, C0, C1
Leaves - YG11, YG13, YG17

And that's all from me for this week's post! Thanks for stopping by and hope to see you all again soon! 

Happy Star Wars Day!

It's May 4th, so that can only mean one thing - it's Star Wars Day! I love Star Wars! Have been a huge fan since I was a kid! Have read a ton of the related books, although I haven't read one for a while now (must fix that!) and have had a complete Star Wars movie binge this weekend. Today though I am going to be watching The Mandalorian now all 8 episodes are finally on Disney+. I hate waiting for new episodes to come out, which means I also have to keep away from any gossip about them!

Anyway...to celebrate today I have made a cute Star Wars themed card using this adorable set from Craftin' Desert Divas, which unfortunately is no more! So glad I managed to get this set before they closed down last year! I managed to do a galaxy sky background with my Distress Ink Oxides which I actually really like! Messy but good fun making this one! I do have to buy Black Soot in the Oxide ink though as I only have a little cube of normal Distress Ink in that colour!


Recipe:

Stamps: Troll Wars from Craftin' Desert Divas

Papers: Lemon Lime Twist (Retired), Basic Black, Whisper White & Gray Granite all from Stampin' Up, Card Blank from Anita's, Make It Colour Blending Card from Make It Crafty

Inks: Lemon Lime Twist (Retired) & Gray Granite both from Stampin' Up, Hickory Smoke, Worn Lipstick, Picked Raspberry, Seedless Preserves, mermaid Lagoon, Twisted Citron, Mustard Seed, Squeezed Lemonade & Blueprint Sketch Distress Ink Oxides, Black Soot Distress Ink

Accessories: Urban Underground Embellishments from Stampin' Up

Copics Used:
Skin for Leia and Luke - E000, E00, E21, E11, E04, R30, R20
Leia's Hair - E25, E27, E29
Leia's Mouth - R20, R22
Leia's Dress & Boots - C0, C1
Leia's Belt - C3
Ewoks - W2, W4, W6, W8
Ewoks' Spears - E17, C5
Green Hood - YG61, YG63, YG67
Brown Hood - E31, E33, E35
Vader's Hair - T5, T7, T9
Vader's Outfit - C4, C5, C6, C7, C8, C9, T5, T7, T9, C1, R46
Vader's Lightsaber - C7, C9, R24, R46
Luke's Hair - E55, E57, E59
Luke's Tunic - W0, W1
Luke's Trousers - W1, W3
Luke's Boots - E41, E42, E43
Luke's Belt & Bag - E13, E15, E18
Luke's Lightsaber - C3, C4, B000, B01
Yoda's Skin - YG11, YG13, YG17
Yoda's Outfit - E42, E43, E44, E47
Yoda's Staff - E25, E29
Chewbacca - E71, E74, E77, E79, C7, C9
Chewie's Bag - E31, E33, E35
Chewie's Crossbow - C4, C6, C8

Now that's a lot of Copic colours! That's all from me for this post folks! Thanks for stopping by and hope to see you all again soon!

Faery Ink Inspiration Post - Hallowe'en Tomte Gnome

Good morning and welcome to my inspiration post for Faery Ink! I have been a bit MIA recently - getting back into work caused my mojo to go AWOL for a while and then we had the lovely(!) Ofsted inspectors in as well, which is always stressful and a busy time! But I am now back! Hopefully with a vengeance too!

Anyway here is today's card using this fabulous image from the Hallowe'en Tomte Gnome Bundle.

This card is for


You can find all the details for this card over on the Faery Ink blog. 

She's Practically Perfect In Every Way!

Good morning and welcome to my post for today! I am entering The Library Challenge this time with a Mary Poppins themed card. I just love the original Mary Poppins film and have yet to see the new one, basically because my boyfriend won't come with me! LOL

Anyway here's my inspiration card.... I used an old stamp from Sassy Studio Designs from when I was on their design team a few years ago with some silhouette buildings die cuts to make it look as if she was flying over them with her umbrella! The sentiment was computer generated.

This card is for

Recipe:

Stamps: Mary Poppins from Sassy Studio Designs

Papers: So Saffron, Basic Black, Whisper White & Pocketful of Posies (Retired) all from Stampin' Up, Make It Colour Blending Card from Make It Crafty

Inks: Copic Markers, Stormy Sky, Tumbled Glass, Broken China, Salty Ocean, Faded Jeans, Blueprint Sketch Distress Oxides all from Tim Holtz

Accessories: head In The Clouds Dies from Die'Sire, Building Dies from First Edition, Red Berry Crystal Drops from Nuvo

Copics Used:
Skin - E000, E00, E21, E11, E04, R20, R30
Hair - E74, E77, E79
Eyes - G16, G19
Lips, Scarf & Belt - R35, R37, R39
Dress - B34, B37, B39
Hat, Cat & Boots - T5, T7, T9
Hat Band - G03, G05
Berries on Hat - R56, R59
Bag - E07, E08, E09
Umbrella - G14, G17, BG57, C5, C7, C9
Buckle & Flowers - Y18

And that's all from me for this post folks! Thanks for stopping by and see you all again soon!

Faery Ink Destiny in Oz As Glinda

Good Morning and welcome to my DT post for the new release of the Destiny in Oz collection from Faery Ink. This month Destiny is Glinda, the beautiful Good Witch of the South. This is the penultimate release in this collection and I have to say I have loved every single one of them, but my fave, Elphaba is coming up next month! You'll love her as well!

I have to apologise for this image as my printer refused point blank to print all the little stars on her dress and crown, despite me changing the settings and printing her several times. In the end I had to hand draw the stars on in roughly the right shape and position. Huge apologies to Amanda, but no idea what game my printer is playing!


And here is the collection so far. Don't they look gorgeous?! And I know now what I am going to do with the full collection when I have coloured up Elphaba and have gone out and bought the things I need to complete it now too! 


This project is also for
Creative Knockouts Challenge #153 Favourite Colour Combo (Anything with pink is always a firm fave of mine, but my all time fave combo is pink, black and white!)

Recipe:

Stamps: Destiny in Oz as Glinda from Faery Ink

Papers: Pink Pirouette, Basic Black, Subtles DSP (Retired) all from Stampin' Up, Super Smooth Card from That Craft Place

Inks: Copic Markers, Silver Spica At You Pen, Clear Wink of Stella

Accessories: White Satin Ribbon from Stampin' Up, Cherish Punch Around The Page Set from Martha Stewart

Copics Used:
Skin - E000, E00, E21, E11, E04, R20, R30
Hair - E50, E51, E53
Eyes - B01, B02, B04
Dress - RV0000, RV000, RV00, RV10, RV02
Butterflies - RV52, RV55, C5
Crown & Stars - C00, C0, C1, C2, RV0000
Dots - C1, RV10, RV02, Silver Spica Pen
Road - Y21, Y23, Y26

And that's all from me for this post folks. Thanks for stopping by and don't forget to pop on over to the Faery Ink blog and check out all the other gorgeous new releases this month or pop in to our Facebook group and find even more inspiration there and join in our monthly challenge too! 

The East Wind Challenge #60 Outta This World

Good Morning and welcome my my DT post for the new challenge at The East Wind. This fortnight our challenge is called Outta This World so we want to see all things related to space - sun, moon, stars, planets or even aliens!

I used the gorgeous Aurora Marilyn for my card, which is the freebie from this month's newsletter. Isn't she stunning?! If you haven't signed up already pop back to The East Wind blog and find out how to get it!

Here is my triptych card closed...


And opened...


This card is also for
Craft-Dee Bowz  August Challenge Anything Goes with a handmade bow (Well my bow opens and closes so I hope that counts!)

Recipe:

Stamps: Aurora Marilyn from The East Wind, Sun, Moon Stars from Whimsy Stamps

Papers: Night of Navy, Smoky Slate, Silver Glimmer Paper, All Is Calm DSP (Retired) & Irresistibly Yours DSP (Retired) all from Stampin' Up, Super Smooth Card from That Craft Place

Inks: Night of Navy from Stampin' Up, Silver Star Gelly Roll Pen, Copic Markers

Accessories: Night of Navy Ribbon (Retired) from Stampin' Up, Oval & Scalloped Oval Nestabilities both from Spellbinders, Star Burst Die from Joanna Sheen, Starry Die from Verve Stamps, Die-Namics Star Border Die from MFT, Star Trail Die from Tonic Studios, Triptych Card Art from Dutch Doobadoo, Winter Wishes Circle Stars Die 6002/2042 from Joy Crafts

Copics Used:
Skin - E000, E00, E21, E11, E04, R20, R30
Hair - B0000, B000, B01
Eyes - B91, B93, B95
Lips - R24, R27
Dress - B91, B93, B95, B97, B99
Background - C00, C0, C1, C2

And that's all from me for this post folks! Thanks for stopping by and don't forget to pop on over to the East Wind Challenge blog and check out all the other gorgeous cards from the DT and why not join in the fun whilst you are there too?! As always there are some fabulous prizes to be won! 

Faery Ink New Release Destiny as Cowardly Lion

Good Morning and welcome to my DT post for the new release from Faery Ink. You may remember that Amanda has been releasing her own version of the Wizard of Oz characters (You can find Dorothy with Toto and Tinman in the store already). This month she has released Destiny as the Cowardly Lion! Oh! My! Goodness! Yep I LOVE this image! Loved colouring all that gorgeous mane!

As I am making a whole Wizard of Oz project, my design is the same as my other two, just a different colour this time. Is she just stunning?!


And here all all three that I have done so far...

This project is also for

Recipe:

Stamps: Destiny as Cowardly Lion from Faery Ink

Papers: Pumpkin Pie, Basic Black & Pumpkin Pie Prints DSP (Retired) all from Stampin' Up, Super Smooth Card from That Craft Place

Inks: Copic Markers

Accessories: Cherish Punch Around The Page Set from Martha Stewart, Whisper White Satin Ribbon from Stampin' Up

Copics Used:
Skin - Skin - E000, E00, E21, E11, E13, R20, R30
Lips - R20, R22
Eyes & Jewels in Crown - G24, G28, G29
Mane - E08, E09, E18, YR18
Tail & Ears - E97, E99
Inner Ears - R20, R30
Heart - R24, R27, R29
Crown & Medal Clip - Y21, Y23, Y26
Leaf - G21, G24, G28, G29, YG23
Dots - G24, G29, E08, E97

And that's all from me for this post folks! Thanks for stopping by and don't forget to pop on over to the Faery Ink blog and check out all the other gorgeous new releases coming up this month. And why not pop on over to the Faery Ink Facebook Group and join in this month's challenge too.

Faery Ink New Release - Destiny as Tinman

Good Morning and welcome to my project for the new release from Faery Ink this month. Last month Amanda released Destiny in Oz - Dorothy with Toto (from the Wizard of Oz), which I just had to have and this month she also released Destiny as Tinman! Eeek I love the Wizard of Oz! Keep your fingers crossed that some more Wizard of Oz images will be released soon!

Now this project is a work in progress. I am going to make 4 or 6 5 inch squares, depending on how many images Amanda releases, all the same style, each in a different colour of the rainbow. I am going to hang them on the wall with the sentiment, There's No Place Like Home in the centre!


And here is my Dorothy and Toto one in blue this time...

Aren't they just gorgeous images together...


This project is also for
Creative Knockouts Challenge #140 Tic-Tac-Toe (I used the last column of Die Cuts/Punches - Shaped Cards - Ribbon/Twine)

Recipe:

Stamps: Destiny in Oz - Tinman & Destiny in Oz - Dorothy & Toto both from Faery Ink

Papers: Gumball Green (Retired), Marina Mist, Basic Black, Polka Dot Parade DSP (Retired), In Colors 2012-14 DSP Stack (Retired) all from Stampin' Up, Super Smooth Card from That Craft Place

Inks: Copic Markers

Accessories: Whisper White Satin Ribbon from Stampin' Up, Cherish Punch Around The Page Set from Martha Stewart

Copics Used:
Destiny As Tinman
Skin - E000, E00, E21, E11, E04, R11
Hair - E30, E33, E08, E09
Eyes - YG11, YG13, YG17
Lips & Heart - R35, R37, R39
Hat & Top - C00, C1, C2, C3, C5
Log - E33, E35, E37
Axe Handle - E25, E27, E29
Axe & Oil Can - T1, T2, T4, T6
Leaf - YG05, YG17
Dots - E30, E33, YG11, YG13, YG17

Destiny as Dorothy & Toto
Skin - E000, E00, E21, E11, E04, R20, R30
Hair - E33, E35, E37, E39
Eyes - G82, G85, G94
Lips - R24, R27, R29
Dress & Bows - B91, B93, B95, B97
Pinafore - B0000, B00
Basket - E21, E23, E25, E27
Dots - B00, B91, E23, E30

And that's all from me for this post folks! Thanks for stopping by and don't forget to pop on over to the Faery Ink blog to check out all the other gorgeous new releases this month and why not join in our monthly Facebook Challenge as well. It's our birthday so come along and join in the celebrations! 

Alicia Bel Challenge #18 - Movies or Anything Goes

Good Morning and welcome to my DT post for the new challenge at Alicia Bel. This month our challenge is to be inspired by the movies or you can just do an anything goes project, but do remember you need to use an image from Alicia Bel to join in. Not got any images? Then head on over to the Alicia Bel store and grab some of these cute and fun digital stamps!

I used the fabulous Super Girl for my card this time. I loved the Supergirl and Superman films from the 1980s when I was a kid and have been watching the new Supergirl TV series recently too and I actually really like it still!


Recipe:

Stamps: Supergirl from Alicia Bel, Kaboom (Retired) from Waltzing Mouse Stamps 

Papers: Pacific Point, Basic Black, Whisper White, Daffodil Delight & Greenhouse Gala DSP (Retired) all from Stampin' Up

Inks: Real Red, Pacific Point, Old Olive, Daffodil Delight, Soft Sky & Tangerine Tango all from Stampin' Up, Copic Markers

Accessories: Clouds Stencil & Structure Paste both from Dutch Doobadoo

Copics Used:
Skin - E000, E00, E21, E11, E04, R20, R30
Hair - E42, E43, E44, E47
Eyes- E23, E25, E29
Cape - R32, R35, R37, R39
Lips, Belt & Badge - R32, R35, R37
Boots & Gloves - B14, B16, B18
Leotard - Y13, Y15, Y19

And that's all from me for this post folks! Thanks for stopping by and don't forget to pop on over to the Alicia Bel blog and check out all the other gorgeous Movies inspired projects from the DT and why not join in the fun whilst you are there too?! As always there are some fabulous prizes to be won!

Alicia Bel Challenge #16 Birthdays

Good Morning and welcome to my post for the new challenge over at Alicia Bel. This month our challenge is to make a birthday project, using one of Alicia's gorgeous images too.

I used the fabulous Hogwarts Student to make a bright, magical and starry birthday card.


This card is also for

Recipe:

Stamps: Hogwarts Student from Alicia Bel, Dreamy Days from Lili of the Valley

Papers: Pacific Point, Daffodil Delight, Basic Black, Whisper White, Brights DSP Stack (Retired) & Polka Dot Parade DSP (Retired) all from Stampin' Up, Copic X-Press It Blending Card

Inks: Daffodil Delight from Stampin' Up, Copic Markers

Accessories: Starry Die from Verve Stamps, Starburst Die from Joanna Sheen, Limitless Layers 1 3/4" Circles Collection from Papertrey Ink, Gold Ice Stickles

Copics Used:
Skin - E000, E00, E21, E11, E04, R20, R30
Hair - Y21, Y23, Y26, E43
Eyes - B221, B24, B26
Dress & Shoes - B21, B24, B26, B28
Tie - Y17
Robe - C3, C5, C7, C9
Wand - E49

And that's all from me for this post folks! Thanks for stopping by and don't forget to pop on over to the Alicia Bel Challenge blog and check out all the other gorgeous cards from the DT and why not join in the fun whilst you are there too?! As always there are some fabulous prizes to be won!

Hearts Quest Fantasy Challenge #53 & Saturday's Crafty Creations #11 Featuring Gnometastic Birthday Surprise from Polkadoodles

Good morning! Long time no see as well. I have really struggled to find any crafty mojo over the past couple of months, but I made a few ca...